Monday, November 19, 2012

Shortcake's Old-Fashioned Pancakes


Shortcake's Old-Fashioned Pancakes
makes 8 servings

1 1/2 Cups all-purpose flour
3 1/2 tsp. baking powder
1 tsp. salt
1 Tbsp. sugar or honey
1 1/2 C. soured fresh goat milk
1 egg
3 Tbsp. butter, melted

In a large bowl, sift together the flour, baking powder, salt and sugar. Combine milk, egg and melted butter; mix until smooth.

Heat a lightly buttered griddle or skillet over medium high heat. Spoon the batter onto the griddle, using approximately 1/4 cup for each pancake. Brown on both sides and serve hot. Add syrup, fruit and whipped cream as desired to top!

Tuesday, November 13, 2012


The Aromatic Brined Turkey


Thanksgiving is one of our most cherished holidays. It’s a time to gather with family and friends, and celebrate the gracious bounty and blessings that have been bestowed upon us over the past year. It is also the time of year when many folks struggle to prepare a juicy turkey ;)

Brining a turkey is one of the best ways to give you a moist, tasty, tender, satisfying holiday bird. The turkey absorbs moisture and flavor in this overnight preparation process. It also cuts down on the amount of work while cooking as it does not require basting and the constant attention that an un-brined bird does.

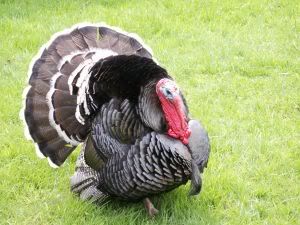
It is important to pick a turkey that has not been injected with a “solution” or a Kosher Turkey (which already has been soaked and salted). A fresh turkey over a frozen turkey is generally preferred for flavor and is less likely to be “adulterated” in any way.

NOTE: You may also use this brining method for a goose

Ingredients

1 12 to 16 pound whole Turkey

Brine Mixture
3/4 cup fresh orange juice
1 drop orange essential oil
1 cup fresh lemon juice
1 drop lemon essential oil
2 cups chopped yellow onions
1 &1/2 cup brown sugar
2 cups Kosher salt or coarse Celtic Sea salt
1/2 cup chopped fresh parsley leaves
8 chopped garlic cloves
1 tablespoon black peppercorns
½ tablespoon allspice berries
1 drop cumin essential oil
1 drop oregano essential oil
2 tablespoons vegetable oil

Aromatics Mixture
1 apple, sliced
1 small onion, sliced
1 cinnamon stick
1 cup water
4 sprigs fresh rosemary
6 fresh sage leaves
1 bay leaf

Yield:10 to 12 servings

Directions for Turkey
1. Rinse the turkey under cold running water.
Pat dry with paper towels and set aside.

2. To make the brining liquid, combine the brine mixture ingredients above
with 2 gallons of cold water in a large glass or stainless steel pot. Stir to dissolve the sugar and salt.

3. Place the turkey in the pot with the brining liquid. Refrigerate at least 12 hours, and up to 24 hours. Turn the turkey periodically to ensure that the turkey is evenly marinated.

4. Preheat the oven to 500 degrees F. Remove the turkey from the brine and put it in a large, heavy roasting pan, on a rack, breast side up. Lightly rinse the turkey (to prevent it from being too salty). Pat dry with paper towels. Discard brine.

5. Rub the turkey with vegetable oil (preferably a good quality olive oil).

6. Gently tuck the wings in under themselves to prevent burning
(this is preferable to trussing the bird, which will only prolong cooking time).

7. Cook the apples, onion, cinnamon, bay leaf and water from the aromatic stuffing mixture on a simmer for about 5 minutes. Lightly stuff bird with steeped aromatics mixture along with the rosemary and sage.* Add aromatic water to bottom of the roasting pan.

*This is not a traditional edible stuffing, it will be discarded after cooking (see stuffing note below).

8. Roast the turkey uncovered at 500 degrees F for 30 minutes. Then reduce heat to 350 degrees F, cover the breast area with foil and roast until meat reaches an internal temperature of 165-170 degrees F. on an instant-read meat thermometer (about 2-2&1/2 hours).

9. Remove from the oven and let stand in the roasting pan or on a serving platter for 20 minutes before carving.

*Stuffing Note:
If you are going to make a traditional accompaniment stuffing side dish, it is strongly recommended you cook it separately from the bird and not stuff it in the bird itself, especially if the bird is over 15 lbs. This is because a large bird like a turkey requires several hours to heat through to the center. A bread (or rice) stuffing provides an ideal environment for bacterial growth.

One way to solve this problem in birds under 15 lbs is by preheating the stuffing to hot - 120 to 130 degrees. This gives the stuffing a head start on the cooking process so that the turkey does not overcook as it waits for the stuffing to reach the proper internal temperature of 165 degrees.

Happy, safe, holiday blessings to all!

Thursday, October 25, 2012

Monday, October 22, 2012

Pan O'Lantern


How cool! Someone made an homage to my goat Pan in the medium of squash! :-)

"Your pictures of your goat Pan inspired me to carve this pumpkin. Thanks for sharing! You Rock!"


Tuesday, October 16, 2012

SPICED MUSCOVADO CARAMEL-DIPPED APPLES


Holiday feast season is rolling in quickly! Around here we aren't too keen on "fakey stuff". That does not mean that we don't enjoy delicious stuff! So, even though we skip the store bought caramel because of all the junk in it, we are not deprived!

Making the caramel requires the use of a candy thermometer. Test it for accuracy before starting. Attach it to the side of a medium sized saucepan of water and boil the water for three minutes. At sea level the thermometer should register 212°F (high altitude folks, use your water boiling temp chart). If it doesn't, then either calibrate it or take the difference into account when reading the temperature.

1-pound dark brown unrefined Muscovado sugar **
1 cup (2 sticks) unsalted butter
1 14-ounce can sweetened condensed milk
1/3 cup pure maple syrup
1/2 teaspoons vanilla extract
1 drop Cinnamon Essential Oil
2 drops Orange Essential Oil
6 Tbsp water
1/4 teaspoon salt
12 popsicle sticks
12 medium organic apples (I.e. Granny Smith, Red Delicious, Gala)
Chopped nuts {or seeds}(optional) *
Melted dark, milk and/or white chocolates
Whipping Cream (if needed)

** You can substitute regular brown sugar for Muscovado, simply add a drop of molasses to give it that richer flavor Muscovado provides.

*My son has a potentially life threatening peanut and tree nut allergy, so instead of using nuts we will be chopping up a mix of raw green pumpkin seeds and tamari seasoned pumpkin seeds and using them to garnish.

Combine first 7 ingredients in heavy 2 1/2-quart saucepan (about 3 inches deep). Stir with wooden spatula or spoon over medium-low heat until sugar dissolves (no crystals are felt when caramel is rubbed between fingers), occasionally brushing down sides of pan with wet pastry brush. This takes about 15 minutes.

Clip a candy thermometer onto the side of the pan. Increase heat to medium-high; cook caramel at rolling boil until thermometer registers 236°F, stirring constantly but slowly with clean wooden spatula and occasionally brushing down sides of pan with wet pastry brush. One minute prior to removing caramel from heat, add the essential oils. Remove caramel from heat. Keeping the thermometer in the caramel to monitor, cool, without stirring, to 200°F which will take about 20 minutes.

While caramel cools, line 2 baking sheets with foil; butter the foil or use waxed paper to line the baking sheets. Push 1 popsicle stick into stem end of each apple. Set up nuts and melted chocolates if you'll be using them to decorate also.

Holding the popsicle stick, dip 1 apple into 200°F caramel, submerging all but very top of apple. Lift apple out, allowing excess caramel to drip back into bowl. Turn apple caramel side up and hold for several seconds to help set caramel around apple. Place coated apple on prepared foil (or waxed paper). Repeat with remaining apples and caramel, spacing apples apart (caramel will pool on foil). If caramel becomes too thick to dip into, add 1 to 2 tablespoons whipping cream and briefly whisk caramel in bowl over low heat to thin.

Chill apples on sheets until caramel is partially set, about 15 minutes. Lift 1 apple from foil (waxed paper). Using hand, press pooled caramel around apple; return to baking sheet. Repeat with remaining apples.

Firmly press seeds/nuts into caramel; return each apple to baking sheet. Or dip caramel-coated apples into melted chocolate, allowing excess to drip off, then roll in nuts or drizzle melted chocolate over caramel-coated apples and sprinkle with decorations.

Chill until decorations are set, about 1 hour. Cover; chill up to 1 week.

Saturday, October 13, 2012

Candy Corn

No, I don't like Candy Corn, now
I know why! ;-p

Saturday, October 6, 2012

The goats were not into being outside today AT ALL as it has been in the upper 20's and low 30's for the high temps with snow and freezing rain. It going down into the teens tonight. They're tucked in for the evening with lots of extra hay and coverings on their windows.

Friday, September 21, 2012

Autumn


My milking goat, Shortcake, says
Happy Autumn to all! 

Tuesday, September 18, 2012

The Rainbow Connection

As I turn 40 and blessed with new beginnings I remind and am reminded by my family, friends and fans - never stop dreaming, believing and making it happen! :-)

"The Rainbow Connection" was written for The Muppet Movie and was nominated for an Academy Award for Best Song in 1979. It is sung by Kermit as the movie's opening number and reprised by the whole cast of Muppets at the end of the movie. The single of this song reached #25 on Billboard's "Hot 100 Singles" chart in 1979. "

"Why are there so many songs about rainbows and what's on the other side?
Rainbows are visions, but only illusions, and rainbows have nothing to hide.
So we've been told and some choose to believe it.
I know they're wrong wait and see.

Someday we'll find it, the rainbow connection.
The lovers, the dreamers and me.
Who said that wishes would be heard and answered when wished on the morningstar?

Someone thought of that and someone believed it.
Look what it's done so far.
What's so amazing that keeps us stargazing and what do we think we might see?

Someday we'll find it, the rainbow connection.
The lovers, the dreamers and me.
All of us under its spell.
We know that it's probably magic.
Have you been half asleep and have you heard voices?
I've heard them calling my name.

Is this the sweet sound that calls the young sailors.
The voice might be one and the same.

I've heard it too many times to ignore it.
It's something that I'm supposed to be.

Someday we'll find it, the rainbow connection, the lovers, the dreamers and me.
Someday we'll find it, the rainbow connection, the lovers, the dreamers and me."

Thursday, August 16, 2012

Chokecherry Pork Chops

Today I put the chokecherry syrup to delicious use and made up a larpin' good marinade for pork chops with it.

All measurements are rough because I didn't really measure anything.
For 6 pork chops I mixed up about half a cup of Chokcherry syrup, 1 heaping Tbsp Dijon Mustard, a few Tbsp Apple Cider Vinegar, a generous dash (or 5) of Garlic Powder, some Rosemary Leaves, cracked Black Pepper and Salt. I let the meat sit in this mixture, turning occasionally, for several hours. The longer you can let it sit the better.

We then grilled the chops to perfection along with some most wonderful Colorado Olathe Sweet Corn (non GMO!) and tossed up a baby greens salad with fresh goat milk feta cheese crumbles.

Wednesday, August 15, 2012

Chokecherries

One of the greatest joys of summer is fresh fruit! Especially when it is freshly picked! We harvested 4 lbs of chokecherries off the bushes on the hillside, and we still have plenty more to gather!

This "forgotten fruit" does not taste very good right off the tree, but it makes delicious vinegar, syrup and jelly very similar in flavor to that of black cherry. These preparations are especially handy for making many other succulent recipes, including desserts, beverages, marinades for meats, etc ...

It is very simple to make chokecherry syrup! Start with clean chokecherries, add enough water to cover plus an inch on top of that. Bring to a boil and reduce heat to a simmer for about 10-15 minutes. Lightly mash the berries without breaking the seeds & let them sit, covered, in the water, until thoroughly cooled (a few hours). Strain berries through a mesh cloth, squeezing out all the juice. Add sugar to juice (1:1 or at least 1:2 sugar to berry juice) and simmer, stirring occasionally, until syrup coats back of a spoon. If you want jelly, add pectin. Let cool. Bottle in glass, refrigerate for longest shelf life.

To make chokecherry vinegar simply place 3 parts chokecherries in 1 part vinegar and 1 part water, let sit for several days, shaking daily, strain when ready and bottle in glass.

Tuesday, August 14, 2012

The New ALOF Homestead

As many of you know A Little Ol'Factory has been closed for several moons due to our relocation across country.

We are happy to say that we are finally moved and settling into our permanent home! Nestled 7200 ft above sea level, in a quiet mountain town of around 1100 folks (as well as quite a few deer, elk, fox, mountain lions, birds ...) on several acres in a Colorado forest, is the century old historic log cabin homestead which is the new residence of ALOF.

We are planning to reopen the shop and begin shipping orders in September. In the coming moons, after we get more settled in, we will start hosting a variety of classes and workshops both on site and at the local community center.

Monday, June 11, 2012

The Whey To Pickle

2 cups Carrots - sliced into strips
2 Tablespoons Ginger fresh, chopped (no need to peel)
2 tsp sea salt (with no additives)
4 Tbsp Whey


Saturday, June 9, 2012

Fermentation Pickled Veggies

I love pickles - all kinds of pickles, from pickled cukes to picked zukes with pickled peppers, cauliflower, carrots and beets in between! Even more than typical pickles, I love fermented pickles! Why? Well ...

Thursday, March 1, 2012

No BPA in my Chicken Cacciatore!

Unless one has a bounty of 'maters from from their own garden and/or the farm available, Pomi tomatoes are the only BPA free and pesticide free canned tomato option out there that I know of - crazy they have to come all the way from Italy, but Viva Italia!

Being that I'm out of the home processed variety I decided to order a case of them from one of my favorite local family owned grocery shops, Natural Grocers by Vitamin Cottage, and Springtime Chicken Cacciatore is once again on the menu in my house!

Ingredients
3 Tbs Extra Virgin Olive Oil
1 whole chicken, or 6 chicken leg quarters cut into pieces (skin on or off, your choice)
1 large onion, chopped
2 celery sticks, chopped
2 carrots, scrubbed, chopped
4 oz chopped mushrooms (optional)
6 garlic cloves, crushed
4 oz red wine
2 packages Pomi crushed tomatoes
4 oz water
1 Tbs balsamic vinegar
Drizzle of honey
1 bay leaf
Chopped flat-leaf Italian Parsley
1 Tbs fresh rosemary, chopped or 1tsp dried, crushed

Directions
Heat the oil in a large skillet over medium-high heat. Add the chicken and cook, turning, until browned on each side. Transfer to a plate and set aside.

Add the onion, celery, and carrots to the pan and saute over medium-low heat for 5 minutes until the onion softens.

Add the garlic (and mushrooms) cook for a another 2 minutes.

Return chicken pieces to the pan, add the wine, raise the heat and bring to a boil.

Add the tomatoes, water, balsamic vinegar, honey, bay leaf and rosemary. Bring to a boil again, then cover, reduce heat to low and cook for 20-30 minutes.

Transfer chicken to a platter, then reduce the sauce over high heat for 5-6 minutes, stirring. Turn off heat, add chopped parsley.

Wonderful when served, topped with sauce, on a bed of quinoa, accompanied by fresh bread and a salad.

NOTE: This recipe can easily be made with rabbit instead of chicken.

Makes approx 6 servings

Friday, February 3, 2012

Homemade Croutons

I remember hearing it said once, in a conversation between chefs, that the French do not take the cuisine of the United States seriously because Americans buy their croutons! Funny, and true.

Making homemade croutons is very easy and rather tasty.

Today I took all the leftovers from this week's home baked bread and transformed the bits it into crunchy cubes which enhance any salad like magic!

Ingredients

3-4 Cups of days old bread cubed into 1" (or smaller) chunks
2 sticks of butter (or substitute some of the butter with olive oil)
6 cloves of garlic finely chopped
Garlic Powder, Dried Basil, and Fine Sea Salt to taste
  1. Preheat oven to 350 degrees F (175 degrees C).
  2. In a large sauté pan, melt butter over medium heat. Stir in garlic; cook and stir for 1 minute. Add bread cubes, and toss to coat and saute for a few minutes.
  3. Spread as a single layer onto a baking sheet.
  4. Bake for 20 minutes, or until crisp and dry. Check frequently to prevent burning!
  5. Toss with additional powdered garlic, herbs and salt as necessary to taste.
  6. Cool before storing in an airtight container.

Sunday, January 29, 2012

Pastured Local Eggs

According to Local Harvest: Eggs from pastured hens contain up to 20 times more healthy omega-3 fatty acids than those their less fortunate cousins, factory hens.

One of the first things we did after moving back to the land of color was find a local source of fresh, pastured eggs!

These wonderful chickens (and their humans) live at about 8,000 feet altitude and happily run free in their yard, eating a diet rich in bugs and worms (umm, the chickens, not their humans {grinz}) .

The ultra natural nourishment and healthy mountain lifestyle show in the eggs. They come from from a variety of chickens, so they sport different color shells (thicker than store bought eggshells and GREAT for starting seeds in, but that will be another blog ..), yet they all have the same, luscious, deep orange yolks that taste far more tasty than any store bought, sadly traumatized, factory farmed, chicken eggs ever taste.

Plus, when buying local in this manner we are supporting a local family, folks who are our neighbors, and their local business! They directly keep food on our table and we directly keep food on theirs, while at the same time keeping money circulating within our community and boosting our local economy.

A win win situation for all involved! Support your local chickens and your overall health! :-)

One note - hard boiled ultra fresh eggs are a nightmare to peel. Eggs have to be at least a month old for the albumin membrane to let go! So, we simply buy an extra dozen or two to "age" for this purpose.

Friday, January 27, 2012

2,534,400 Steps Closer To Home


The ALOF family has relocated over a thousand miles from our gulf coast abode.

We're now over a mile high and 2,534,400 steps (give or take a few) closer to our ultimate Rocky Mountain life.

The business is hibernating for winter and spring while this short term transition is occurring. We look forward to serving everyone again when the spring thaws this wild winter and summer stars fill the night sky!

We are looking forward to finding and settling into our new long term homestead and in the meantime, are getting reacquainted with the high country and back into the swing of things!

This picture was taken in Douglas County, Colorado :-)

Making Multigrain Bread


Keeping the kitchen toasty while the snow falls outside! This bread is hearty, delicious and goes really well with fresh soup!


Note, I am at 6000 ft altitude, measurements are approximate


1 cup poolish (starter)*
1/4 cup water
1 tablespoon extra virgin olive oil
1 tablespoon milk
1/4 cup honey
1/8 cup molasses (unsulphured)
1 egg
1 teaspoon unrefined salt
1 tablespoon raw sunflower seeds
1 tablespoon toasted sunflower seeds
1 tablespoon raw pepita pumpkin seeds
1 tablespoon flax seeds
1 tablespoon millet
1 tablespoon quinoa
1 tablespoon oats
1 tablespoon oat bran
1 tablespoon wheat bran
1 cup bread flour
2 cups whole wheat flour
1/4 cup semolina flour
1 1/2 tablespoons bread yeast

I let the bread machine knead it, checking to make sure the moisture level was correct (adding water or flour as necessary).

After the dough was done rising, it was formed into a loaf, sprinkled with a bit of wheat and oat bran, left to rise a bit more and then baked at 350 degrees until it was done :-)

*To make a poolish mix 1 cup of lukewarm water with 1 cup of flour and add a packet of bread yeast. Stir. It should be a pancake/waffle batter consistency. Let sit for at least 24 hrs and up to 5 days. It'll become bubbly and smell yeasty.